Technical analysis by BTC_ETH_Intra_Day_Analysis about Symbol BTC on 18 hour ago

BTCUSDT Trade Plan (December 08, 2025)
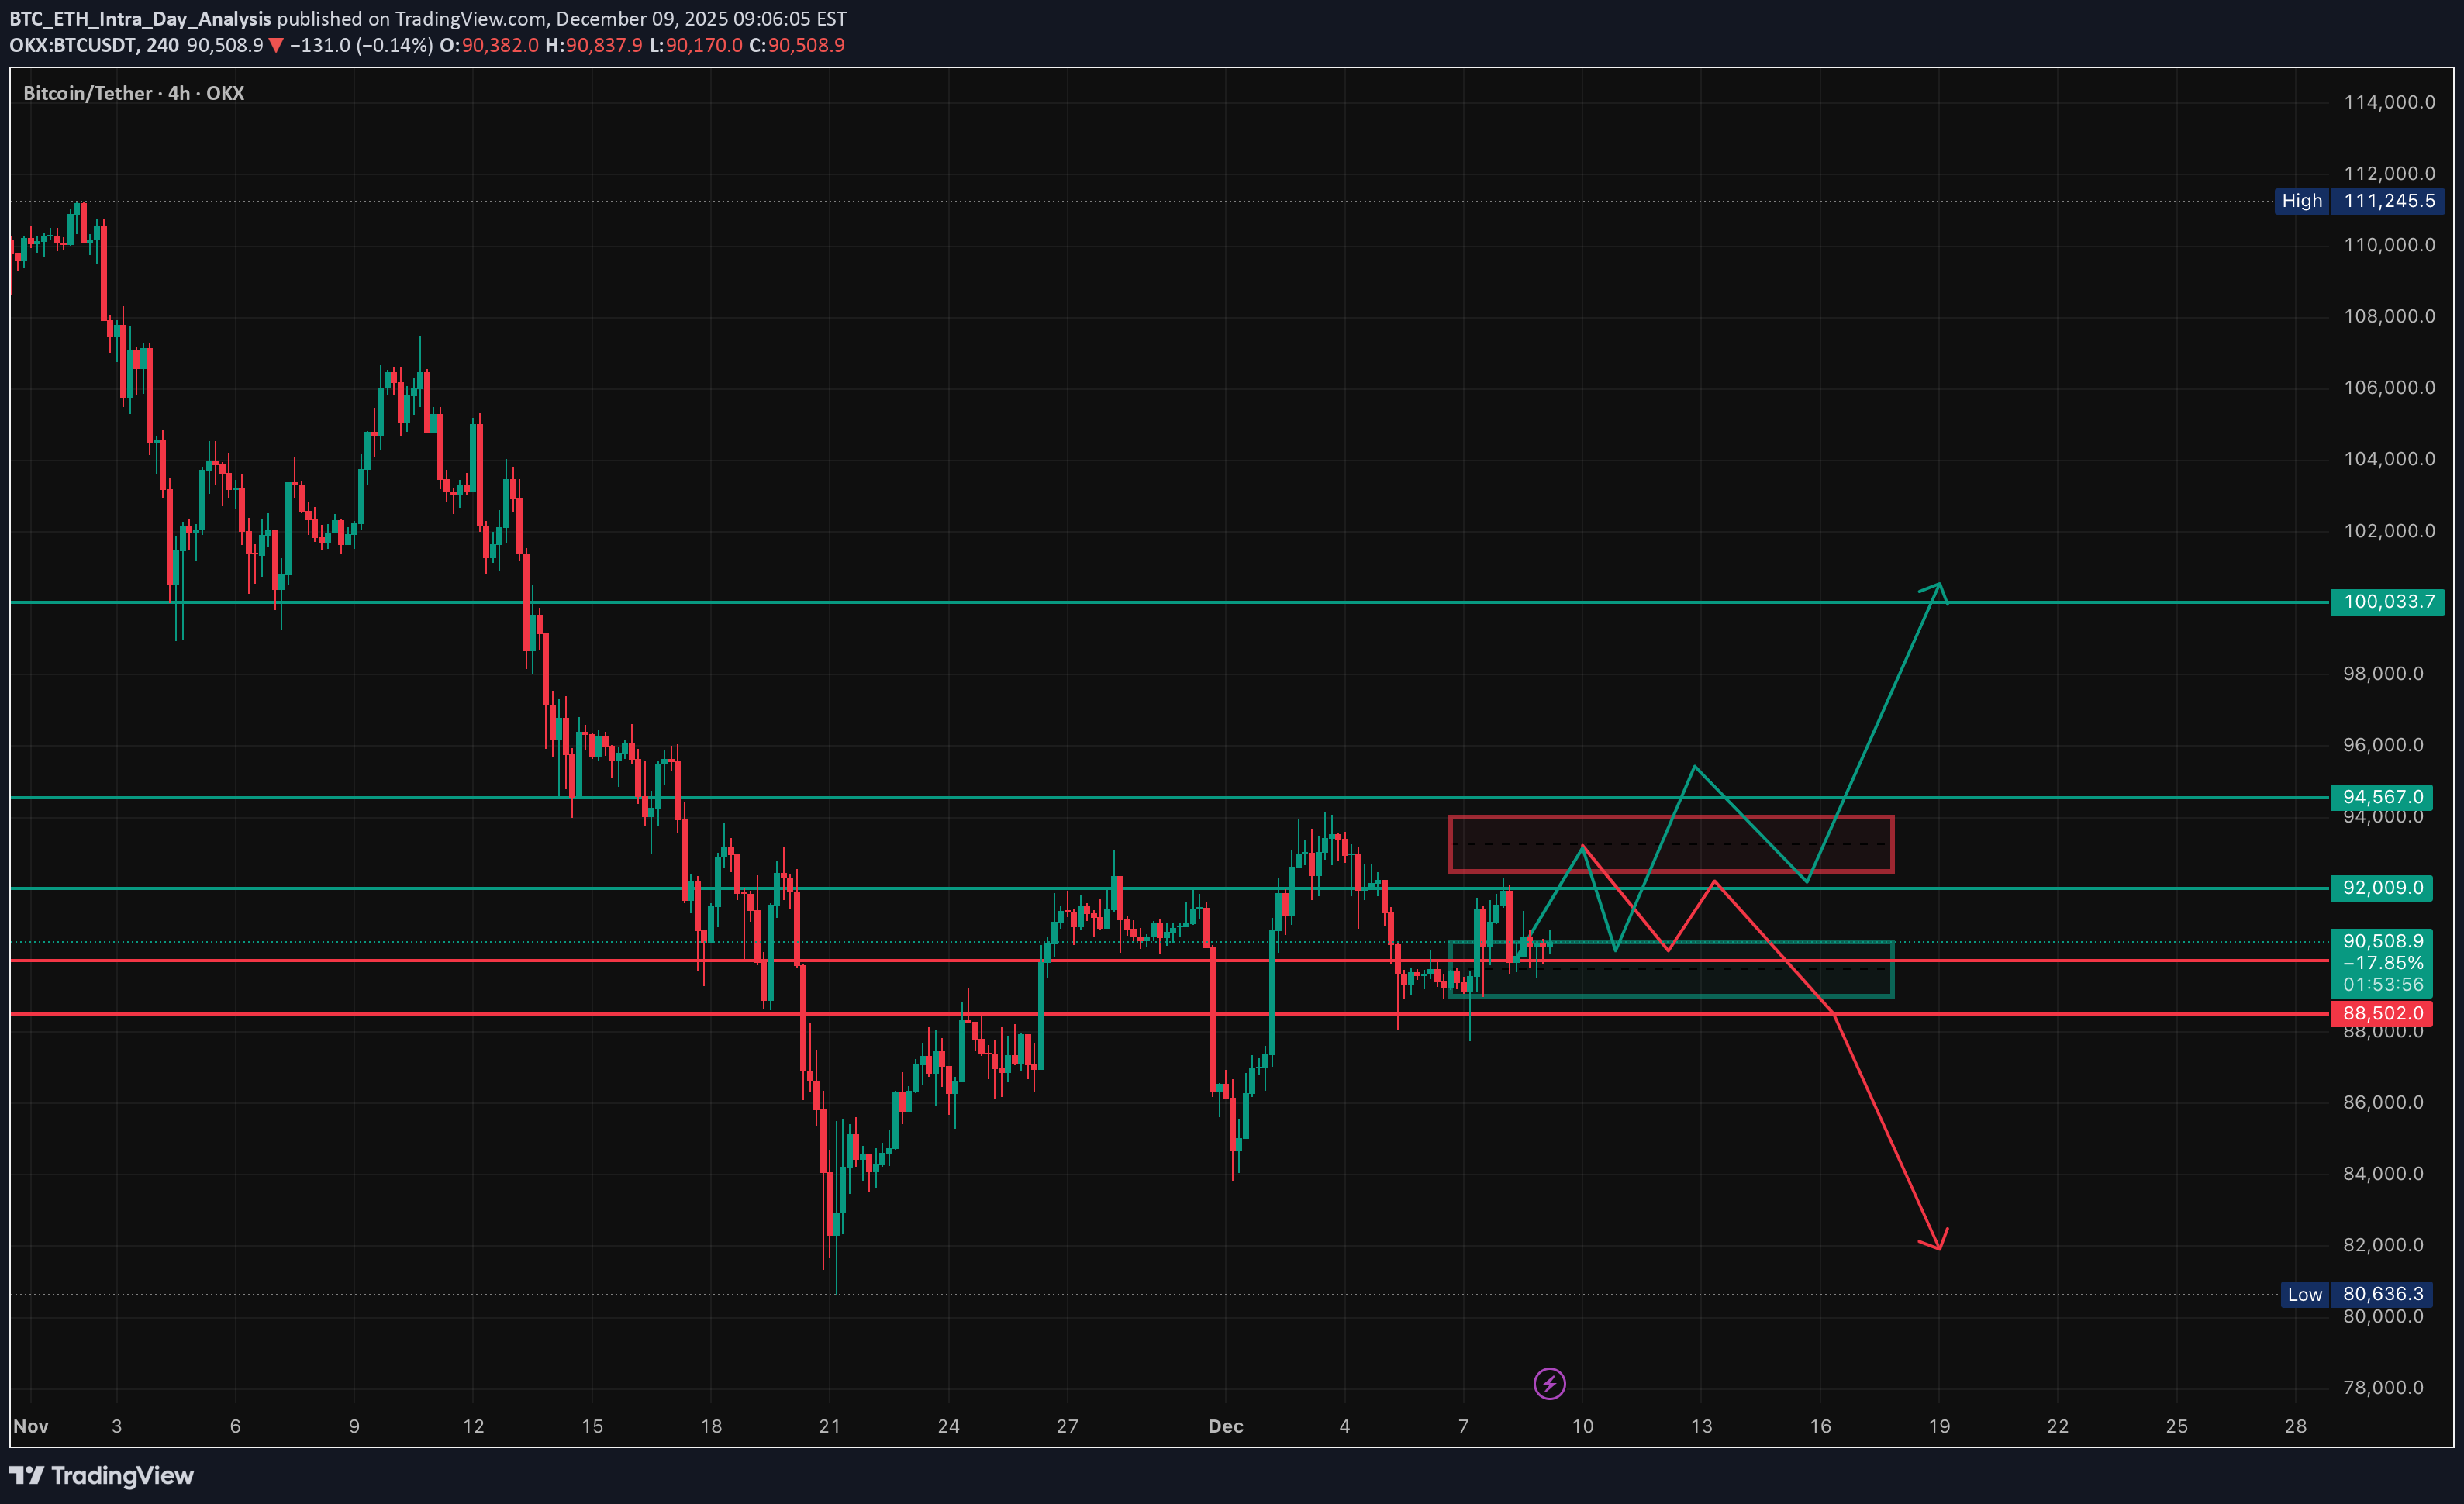
BTC Trade Plan (December 08, 2025) (D1 Bearish / H4 Sell Rallies → Compression / H1 Neutral / M15 Chop) ⬛️ 1. Higher Timeframe Context (D1 and H4) • D1 bias: bearish (descending channel post-ATH) • D1 range (approx): 84,000 – 126,000 (current lower third) • Key D1 zones: • Supply: 100–105k (broken) • Demand: 88–90k channel low • H4 bias: sell rallies turning compression (ascending triangle forming) • H4 zones of interest: • H4 Sell Zone 1: [92,000 – 94,000] – recent rejection + supply cluster • H4 Buy Zone 1: [88,500 – 90,000] – weekend low + trendline Active setups counter-trend long on dip (whale accumulation support), trend-aligned short only on clear rejection. ⬛️ 2. Preferred Setups by Horizon 🔳 2.1 Swing Setup (D1/H4) Counter-trend long the channel low / whale accumulation zone. Time horizon: multi-day to weeks. 🔲 2.2 Intraday Setup (H1 focus) Buy dips to 89.5-90k or breakout above 92k. Time horizon: intraday to overnight. ▫️ 2.3 Scalp Setup (M15 focus) Scalp range 90-92k or absorption plays — higher risk in chop. ▪️ 2.4 Arbitrage/Pairs: BTC dominance rising → BTC outperforming alts short-term. 🟩 3.1 Long Setup (Trend-Aligned with On-Chain / Swing-Intraday) • Execution timeframe: H4/H1 • Trigger timeframe: M15 • Entry zone: [89,000 – 90,500] • Pattern tags: [liquidity_sweep_reclaim, absorption_at_level, delta_divergence_low, range_low_absorption] Trigger conditions: • Successful defense 88-90k zone + CVD higher low • H1/H4 BOS up on volume • Whale accumulation continuation 🟥 3.2 Short Setup (Counter-Trend / Scalp Only) • Execution timeframe: H1 • Trigger timeframe: M15 • Entry zone: [92,500 – 94,000] • Pattern tags: [range_high_rejection, vwap_rejection, double_sweep_high] Trigger conditions: • Clear rejection with delta divergence high • Failure to break 94k pre-FOMC 🔴 4. Stops (Invalidation Levels) Long setups: 87,500 (channel break = bear confirmation) Short setups: 94,500 (breakout = squeeze) 🟢 5. Targets Long (swing/intraday): • TP1: 92,000 (VWAP/H1) • TP2: 94,000-95,000 (supply test/H4) • TP3: 100,000+ (HVN/D1 optional) Short (scalp): • TP1: 90,000 • TP2: 88,500 ⬛️ 6. Position Sizing • Baseline trend-aligned long (on-chain supported): 1.0% • Counter-trend short: 0.4% • Adjustments: +20% (whale buying + clean lev + Fed tailwind) → Effective: longs 1.2% risk, shorts 0.3% max ⬛️ 7. Risk Flags • FOMC Wednesday → vol expansion risk • Thin liquidity mid-week • Residual weekend trauma → fake moves possible • Macro correlation re-assertion if equities dump ⬛️ 8. Flip Conditions Bull → bear flip: clean close below 88k with volume + funding negative Bear → bull flip: H4 close >94.5k + CVD reset + whale continuation ⬛️ 9. Alternative Scenario Reject hard at 92-94k → descending triangle breakdown → fast move to 84-87k LVN void (bear trap completion, high risk short only with tight stop). ⬛️ 10. Model Self-Critique • Assumptions: whale accumulation continues, Fed delivers dovish cut, no macro shock • Vulnerabilities: sudden risk-off equities dump, whale distribution resumption, FOMC hawkish surprise • Behavioural: do not chase breakouts pre-FOMC, do not average into losing shorts against whales ⬛️ 11. Uncertainty and Constraints Uncertainty: medium → require flow + pattern confirmation, no high lev, prefer size on confirmed absorption only.