Technical analysis by Risk_Adj_Return about Symbol BTC on 8/19/2025

Risk_Adj_Return
BTCUSDT | Long Setup | Channel Break | Aug 19, 2025
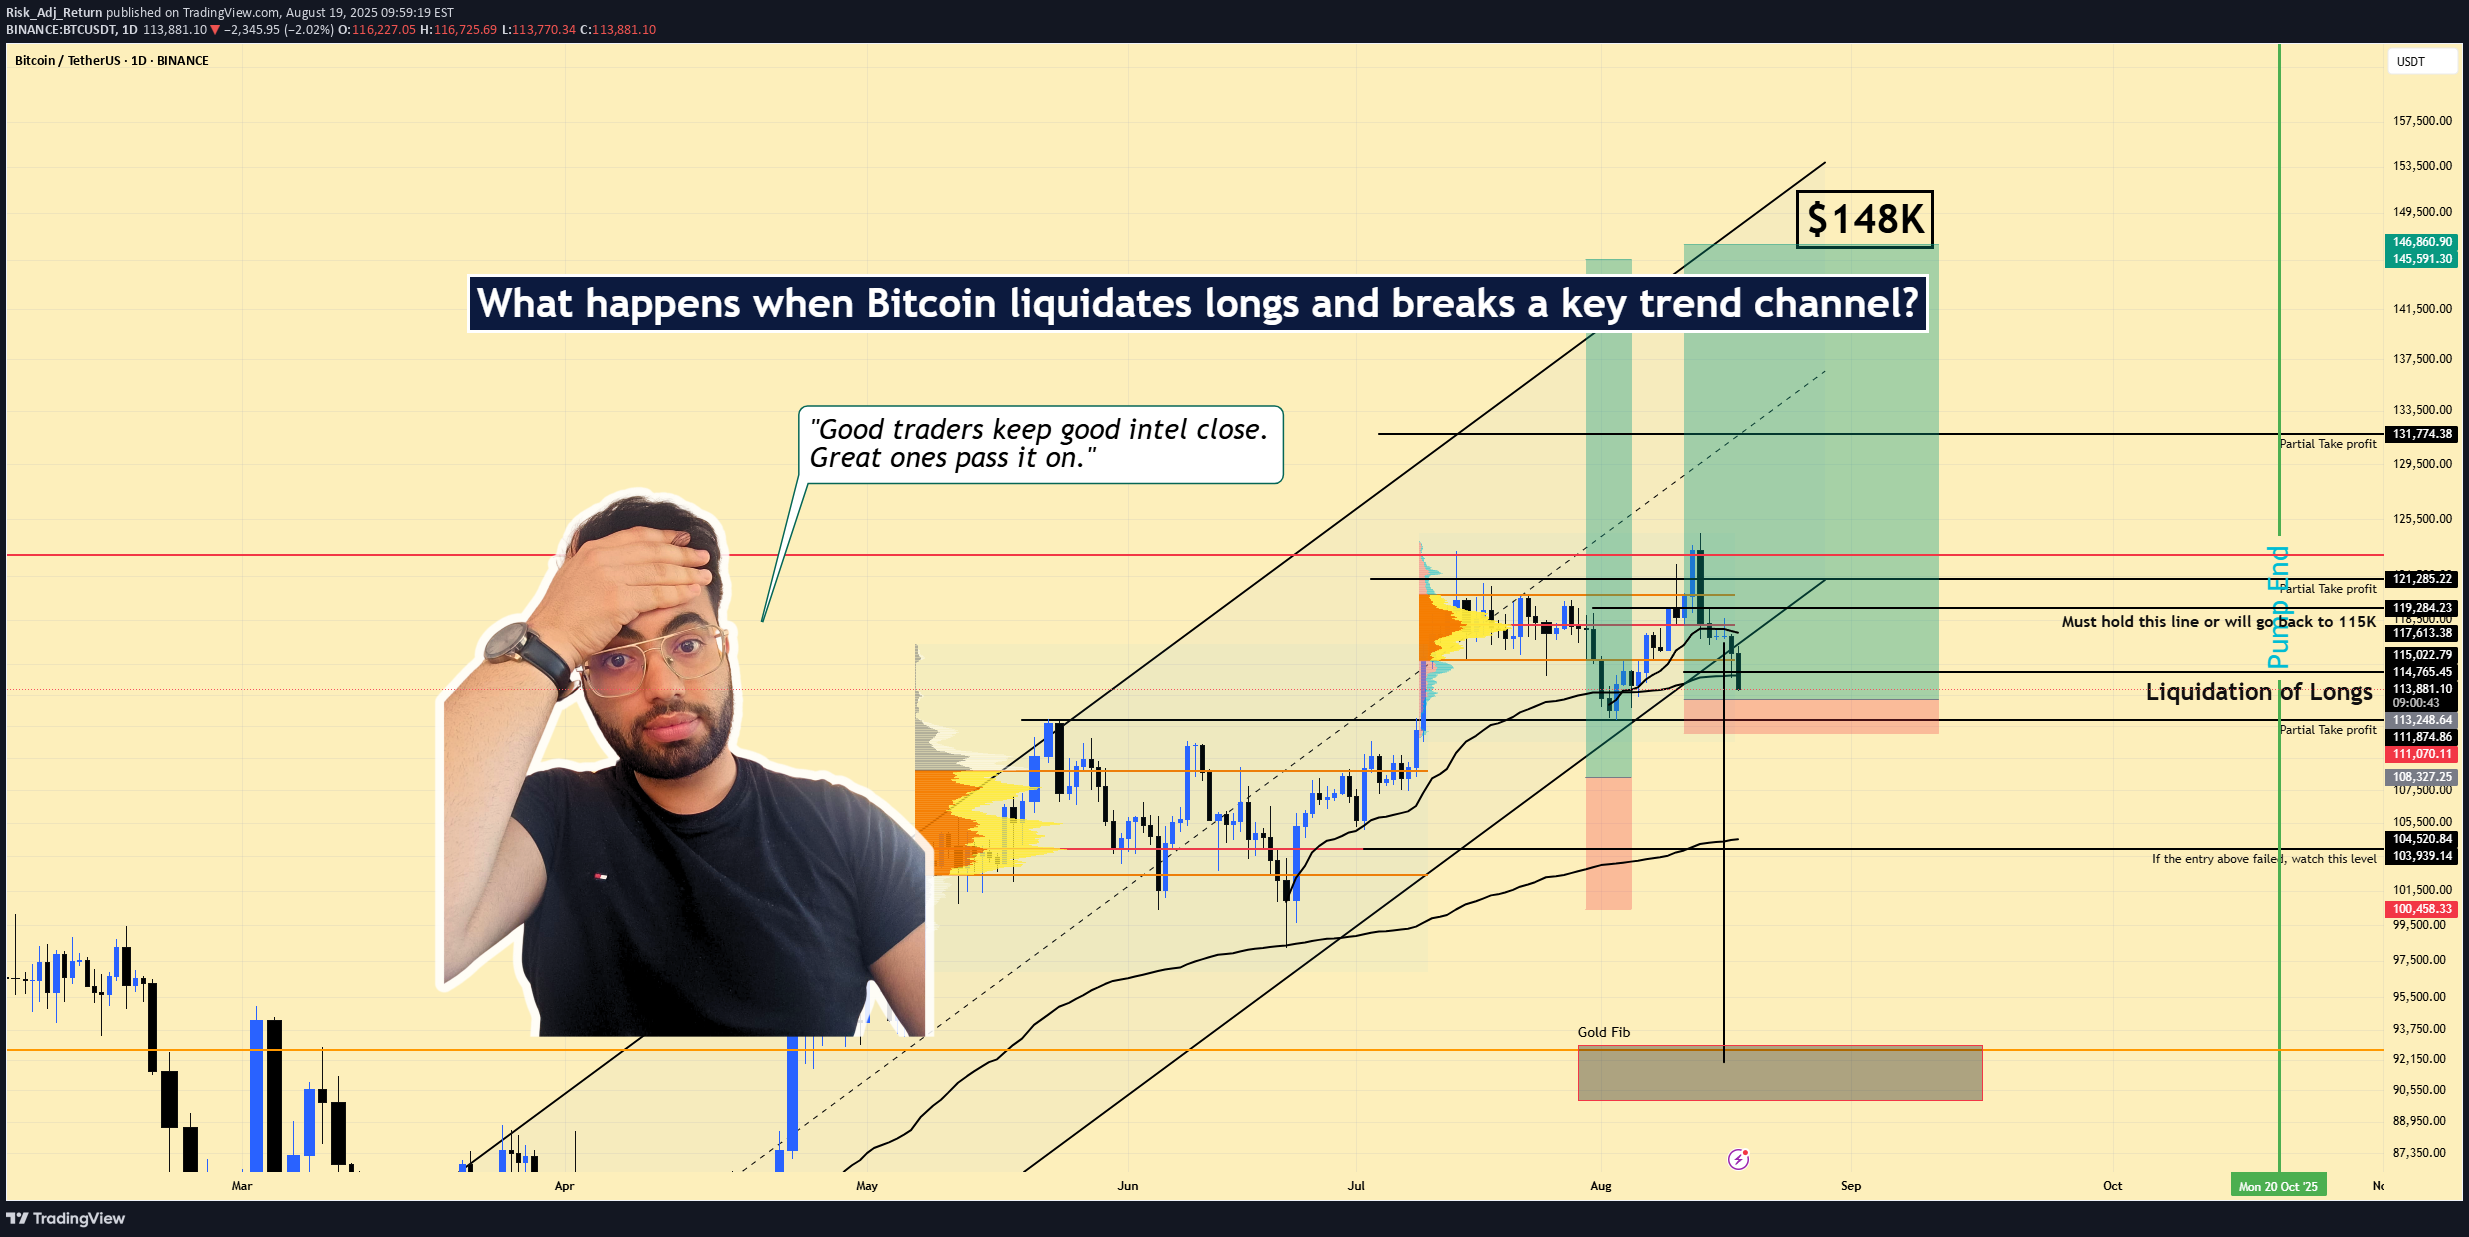
📌 BTCUSDT | Long Setup | Channel Break + Liquidity Sweep Thesis | Aug 19, 2025 🔹 Thesis Summary Bitcoin has broken below a key ascending channel support, triggering long liquidation into a high-volume node. This opens the door for a potential liquidity reversal targeting short liquidation above $130K, contingent on holding key demand near $112K. 🔹 Trade Setup Bias: Long Entry Zone: $111,000 – $113,000 Stop Loss: Below $108,300 Take-Profits: TP1: $121,825 TP2: $131,774 TP3: $137,000 Max Target: $148,000 Risk/Reward: Approx. 4.5R depending on entry precision 🔹 Narrative & Context Price has exited the lower boundary of a multi-week power channel, which previously acted as strong resistance and later support. The breakdown triggered long liquidations into a key demand zone around $112K, marked by the 200 EMA and visible volume profile support. If price stabilizes here, the move could trap aggressive shorts and fuel a squeeze higher. This setup is also framed by prior liquidity patterns, with the recent drawdown clearing open long interest while keeping the macro structure intact unless $108K breaks. The next high-liquidity zone above sits near $131K, aligned with historical resistance and partial take-profit zones. 🔹 Macro Considerations S&P 500 Risk: September correction is in play due to expected rate cuts and macro uncertainty. Historically, SPX pullbacks correlate with BTC drawdowns — watch for risk-off spillover. Money Supply (M2): Flattening or decline in M2 supply globally would constrain liquidity and cap upside in crypto risk assets. If $108K Breaks: Eyes shift to the major "Gold Fib" demand zone at $92K–$88K — a structural retest area from prior cycle value. 🔹 Forward Path If this post gains traction (10+ likes), I’ll post a higher-timeframe breakdown and updated key levels into September volatility. 📌 Like & Follow for structured ideas, not signals. I post high-conviction setups here before broader narratives play out. ⚠️ Disclaimer: This is not financial advice. Always do your own research. Charts and visuals may include AI enhancements.