Technical analysis by WavePoint_FX about Symbol PAXG on 7/23/2025

WavePoint_FX
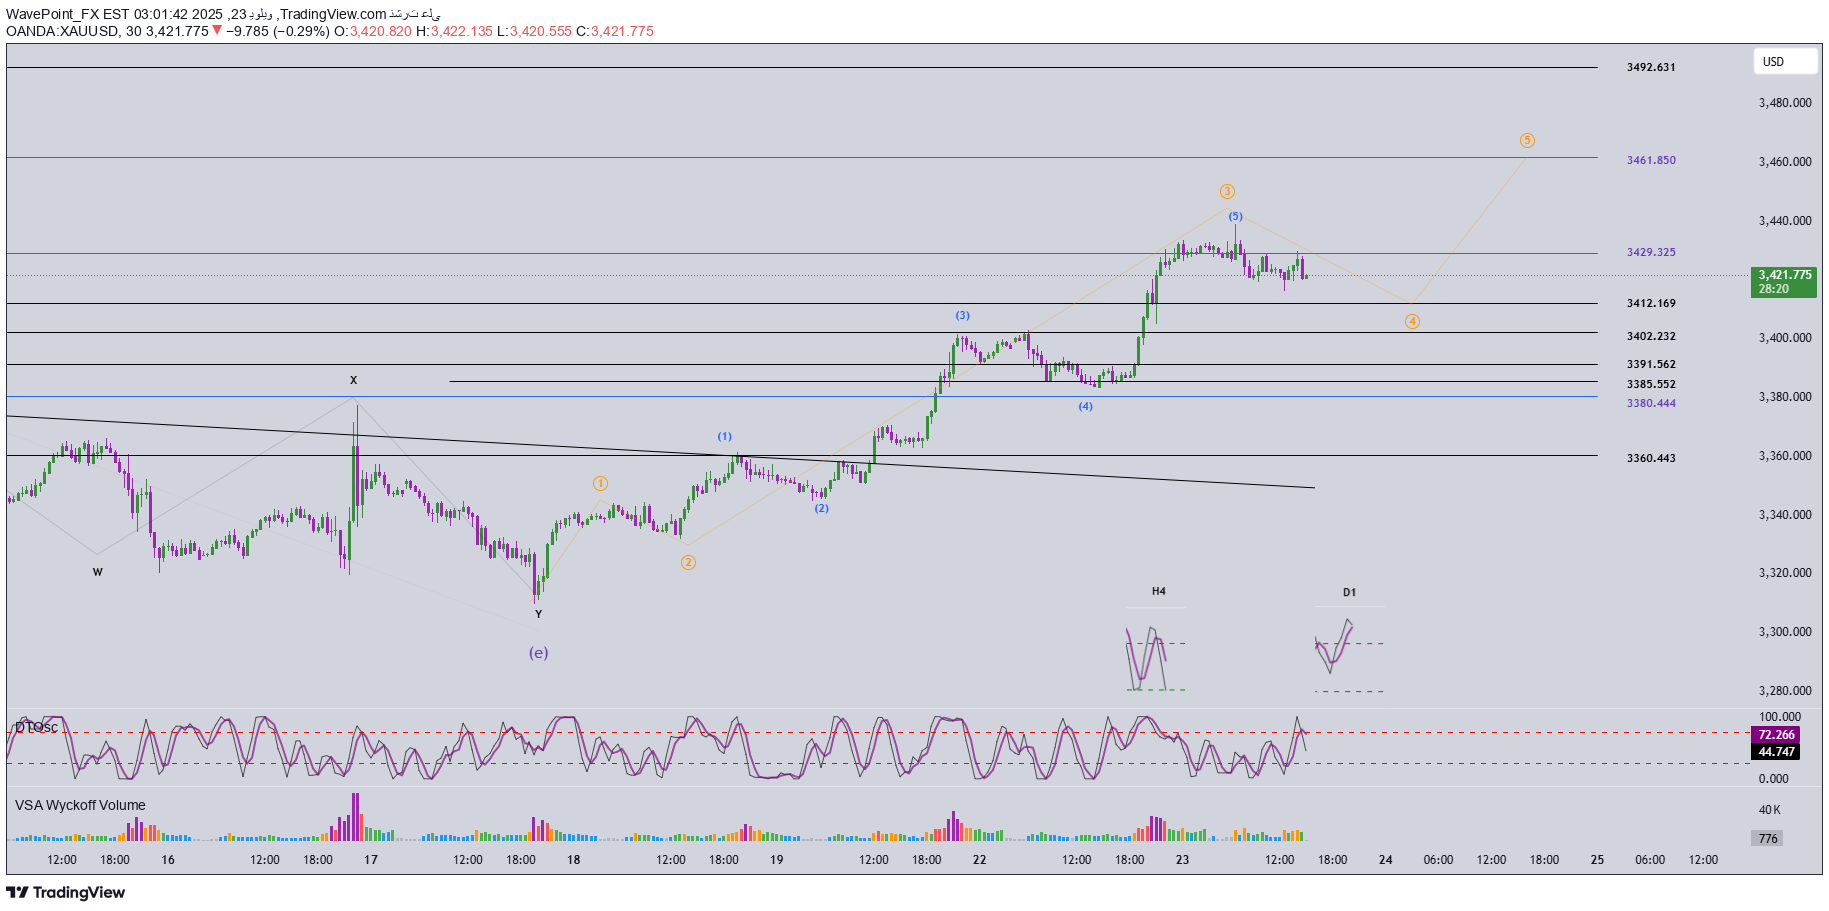
🔍 A momentum analysis: • Daily time frame (D1): Daily momentum shows signs of a potentially low reflection. You should wait for the closure of today's candle to confirm this. This reference indicates that the upper momentum began to weaken. • The time frame is 4 hours (H4): momentum in a state of reflection. We may need two additional dumping candles to push the indicators towards the saturated saturation area →, indicating a possible continuation of the decline during the day. • The time frame is 1 hour (H1): the momentum currently in the saturated saturation area, and the indicator lines are sticking to each other →, which indicates the possibility of a slight decline or side move (accidental). 🌀 Update Elliott Structure: • On the H1 frame chart, a five -pointed structure (5 waves) is formed in yellow. The third wave (yellow) appears to be completed, and this is confirmed by the presence of an internal structure of 5 sub -waves in blue. Currently we are in the fourth wave (yellow), which is a corrective wave. 🔸 The target areas for the fourth wave (yellow): • The first region: about 3412 • The second region: about 3402 📌 After the fourth wave is completed, the market is expected to start forming the fifth wave (yellow). 🔸 The expected goals of the fifth (yellow) wave: • The first goal (TP1): 3461 • The second goal (TP2): 3492 (in case of expansion) 🔄 Mensing between momentum and wave structure: • The potential reflection of the daily momentum (D1) indicates that the upward trend may approach its end - which is in line with the hypothesis that the fifth wave is the last before a large correction occurred. • The momentum in H4 and H1 supports the current correction scenario in the fourth wave. ✅ The fourth wave often takes the shapes of the zigzag, a flais or triangle → We are waiting for a strong board of rise on the H1 frame to confirm the end of the fourth wave and start the opportunity to enter into a purchase (Buy). 📊 Trading plan: The first purchase area: • Buy Zone: 3414 - 3412 • Stop loss (SL): 3407 • Goal 1 (TP1): 3439 • target 2 (TP2): 3461 • Terminal 3 (TP3): 3492 🟩 The second purchase area: • Buy Zone: 3403 - 3401 • Stopping loss (SL): 3393 • Goal 1 (TP1): 3439 • target 2 (TP2): 3461 • Terminal 3 (TP3): 3492
